Hey there, gun enthusiasts! Tired of those flimsy plastic cases? Want something a little more sturdy and stylish to protect your precious firearms? Well, listen up, because today we're diving into the world of woodworking and building a custom gun case from scratch!
This ain't rocket science, folks, but it's definitely a fun and rewarding project that'll leave you with a case you'll be proud to show off. We're talking about a real, handcrafted masterpiece, not some mass-produced, plastic hunk of junk. So grab your tools, put on your favorite playlist, and let's get this show on the road!
Step One: The Blueprint
First things first, we need a plan. No, not a blueprint, but a clear vision of what we want our final product to look like. Do we want a classic, traditional case with a simple design? Or maybe something more modern with sleek lines and unique features? The choice is yours, but let's keep it practical too. Think about the size and dimensions of the guns you plan on storing. You want enough room for the guns, but also any accessories like scopes, cleaning kits, or even ammo.
Step Two: Gathering Your Arsenal
Now, let's talk about the tools and materials. This is where things get exciting! You're gonna need a few basic woodworking tools like a saw, a drill, a sander, and some clamps. Don't forget some sandpaper to smooth out those rough edges. You'll also need some wood, and this is where you can really get creative. Hardwoods like oak, walnut, or cherry look fantastic and are durable, but plywood can be a more budget-friendly option. Don't forget the hardware! You'll need hinges, latches, and maybe some decorative accents like brass corner protectors.
Step Three: Cut & Construct
Alright, now let's get down to business! The first step is cutting out your wood pieces according to your chosen dimensions. Measure twice, cut once, folks! Precision is key here. Once you have all your pieces cut, you'll need to join them together. Glue and screws are your best friends here. You'll be constructing a box, so you'll need a bottom, sides, top, and a lid. Make sure you leave some space for the lid to fit snugly, but not too tight. This is where clamps come in handy to hold everything together while the glue dries.
Step Four: Sanding & Refinishing
Alright, now let's get this beauty looking its best. Grab your sandpaper and get to work! Smooth out all the rough edges and imperfections. You want a perfectly smooth surface for the final finish. There are countless options for finishing your case. From classic stains and varnishes to more modern paint finishes, it's all up to your personal taste. Just make sure you choose a finish that's durable and protects the wood from scratches and moisture.
Step Five: The Finishing Touches
Now comes the exciting part! Let's add some personality to our case. You can customize your case by adding a personalized inscription, some decorative hardware like brass corners, or even some leather accents. Let your creativity flow!
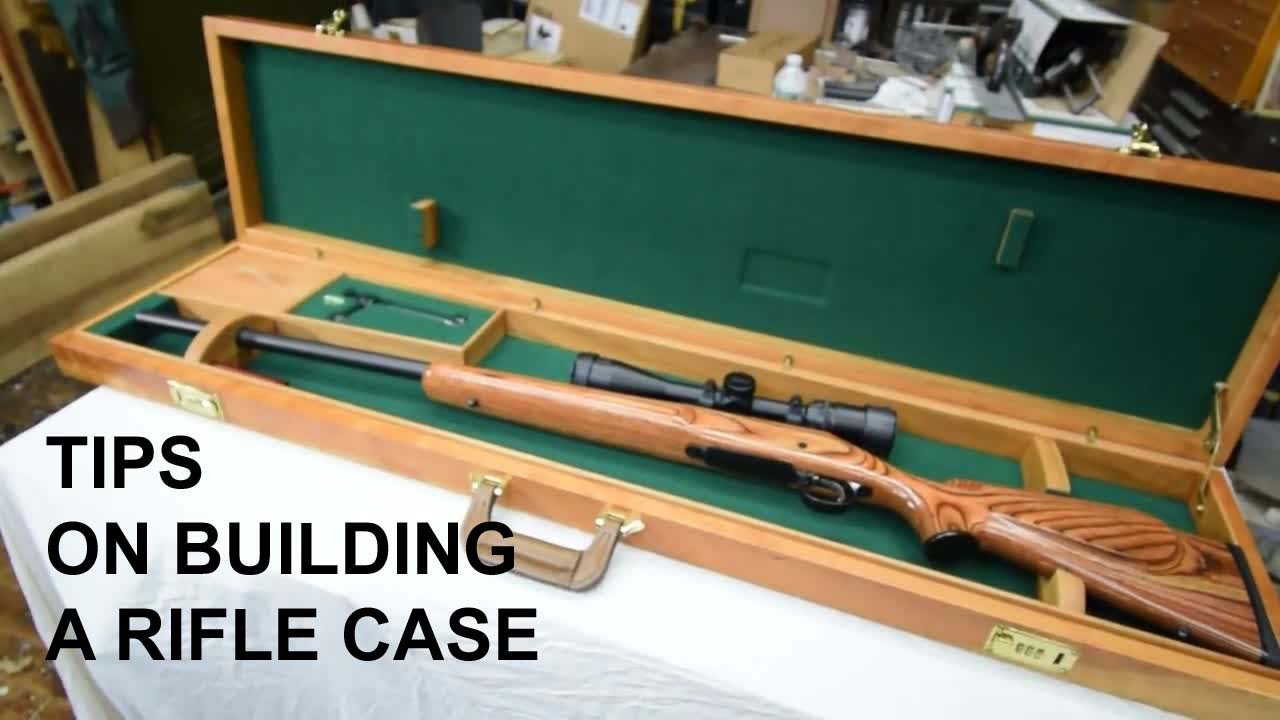
Step Six: Foam Padding & Lining
Now, let's protect those precious firearms. Foam padding is a must! You can use pre-cut foam sheets from your local hardware store, or get creative and cut your own to fit your gun perfectly. This is where your meticulous planning comes in handy. You can even add different densities of foam for different guns, providing extra protection for those fragile scopes or delicate sights. Once the foam is in place, you can line your case with soft fabric like velvet or felt. This will add a touch of luxury and help prevent scratches.
Step Seven: The Finishing Touches (Again!)
Almost there, folks! Now, let's add those final touches that make this project truly unique. Install your hinges and latches. Make sure they're secured properly and function smoothly. Add any decorative hardware or accents you've chosen. You can even add a lock for extra security.
Step Eight: Show Off Your Work!
Congratulations! You've just crafted a beautiful and functional gun case, something to be proud of. Now, go show it off! Showcase your craftsmanship and tell the world about your DIY masterpiece. You'll be the envy of every gun enthusiast with this custom-made masterpiece.
Bonus Tips
Don't be afraid to experiment! This is your project, so personalize it to your liking.
Plan ahead! Measure twice, cut once! A good plan will make the process smoother and less stressful.
Take your time! Don't rush through the steps. Enjoy the process of building your own custom gun case.
So there you have it, folks! A DIY guide to building your own custom gun case. With a little time, patience, and a passion for woodworking, you can create a masterpiece that will protect your firearms for years to come. Now, get out there and start building!

0 comments:
Post a Comment